Create a Photo ID card using a standard template
*You can download Smart ID from [IDP's Download center]
A. Once you have completed downloading Smart ID,
Double-click the Smart ID Icon to get started.

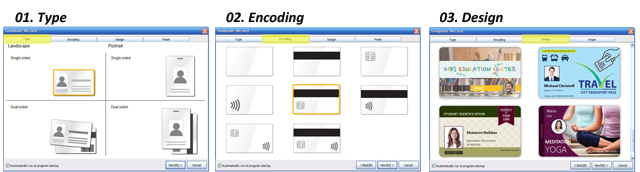
B. Depending on your application,
you can select a card type, encoding type, and card design.
For example,
In order to create a Dual-sided_Student photo ID with
Magnetic and IC chip encoding, you'd select the following in the Wizard:
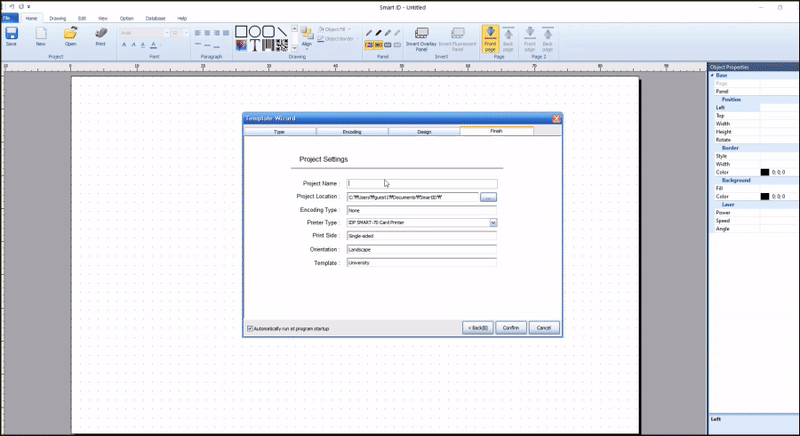
C. Once you have created your template,
you will be prompted to create a project name.
Please do so without any spaces between words or characters.
Additionally, please be sure to select the printer that is installed on your PC.
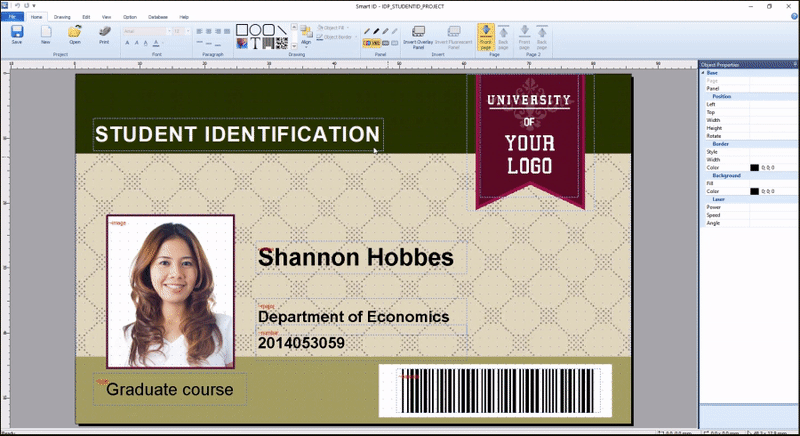
D. Detailed Design Template Setting
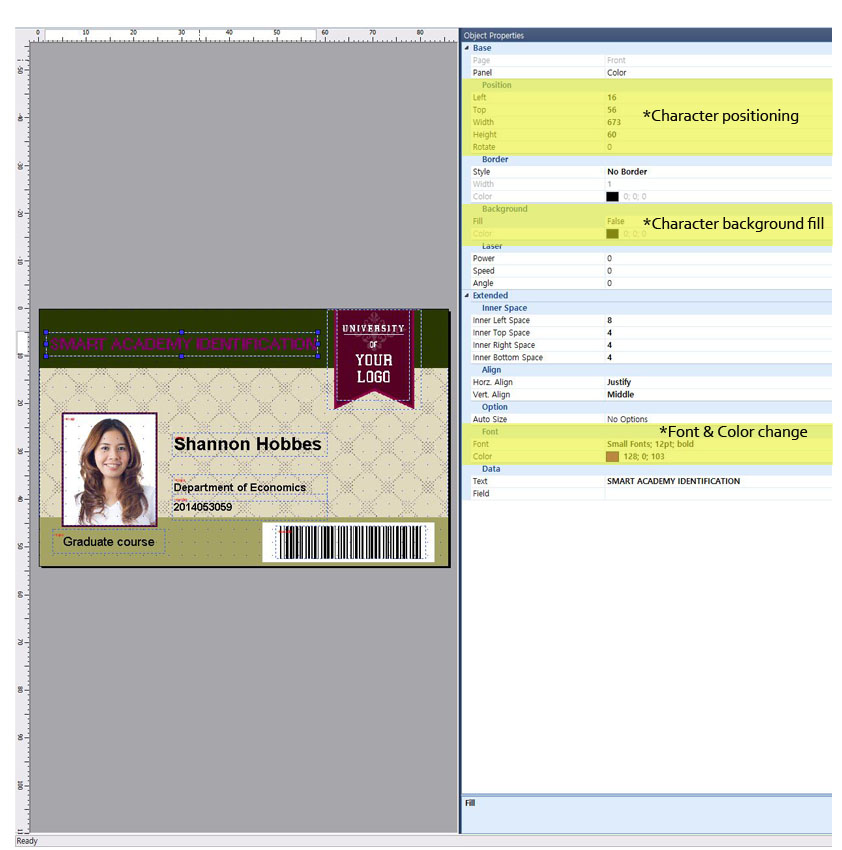
• Character change
When changing text, Double click the text box and type over
the default text in the content box.
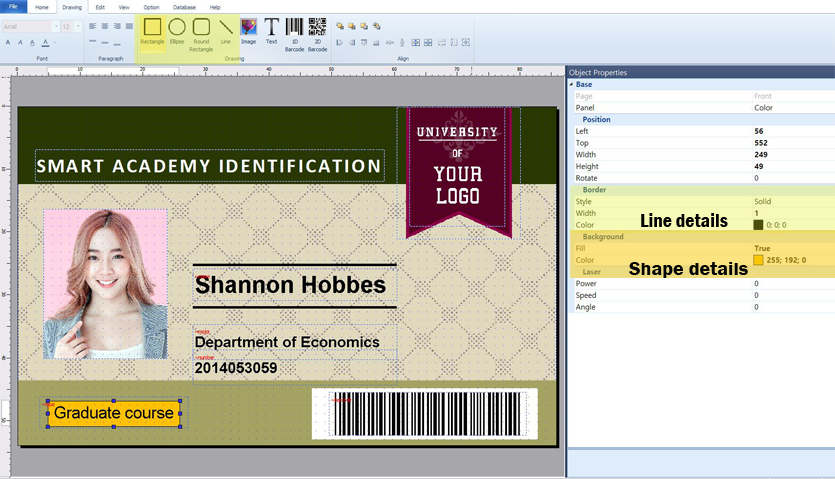
Using character and object properties, you can change font design, size and color.
In addition, filling text box and change position are available by adjusting option values or keyboard.
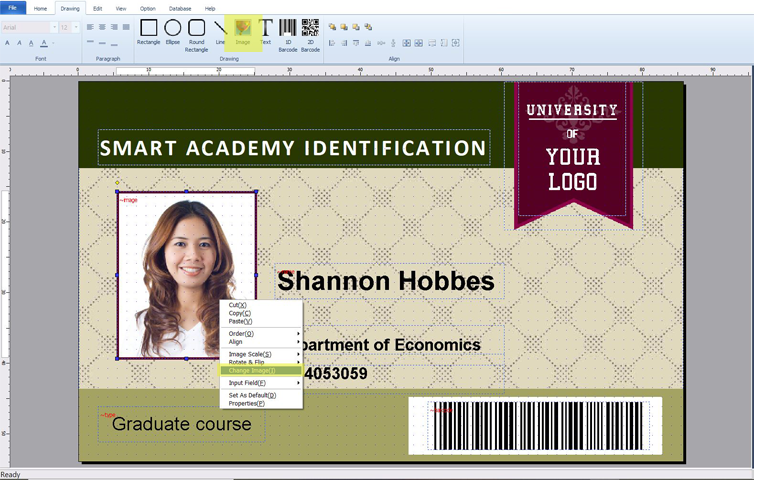
• Image change & insert
In the student ID card template, if you want to change the photo image,
Simply right-side click on the mouse or
Move to [Drawing] and click the [Image] icon on the top.
When you click the image icon, you can set your photo size, as shown below.
Sometimes, you don’t have the correct photo size file.
In that case, just click the [Auto portrait button] to [True]
SmartID will automatically size your photo.
Adding your company’s logo is done the same way:

• Insert & modify the shape
You may want to add a new element by using a shape and line.
• Barcode insert
Smart ID has two barcode options: 1D and 2D Barcode
Select the barcode type you need and simply input the serial data/number
on the pop-up box.
To add a QR Code, select 2D QR code in the barcode settings and then adjust its size.
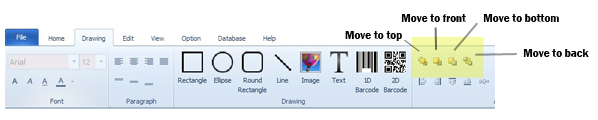
• Object orders change
Do you know how to stack text in the filled shape?
Sometimes, you may need to highlight your student name or company symbol.
In that case, you can do so using shape and text.
However, when you make a new filled shape, you may notice that your text disappears.
There are four ways to do so:
• Modify background image
To change background color or image, simply click the [option]
and, you will see the changing color and image setting.
Keep in mind that background-size is a default value,
So, adjusting background image size is disabled.

• Print setting & Print
Before printing a card, double check to be sure your printer settings are correct:
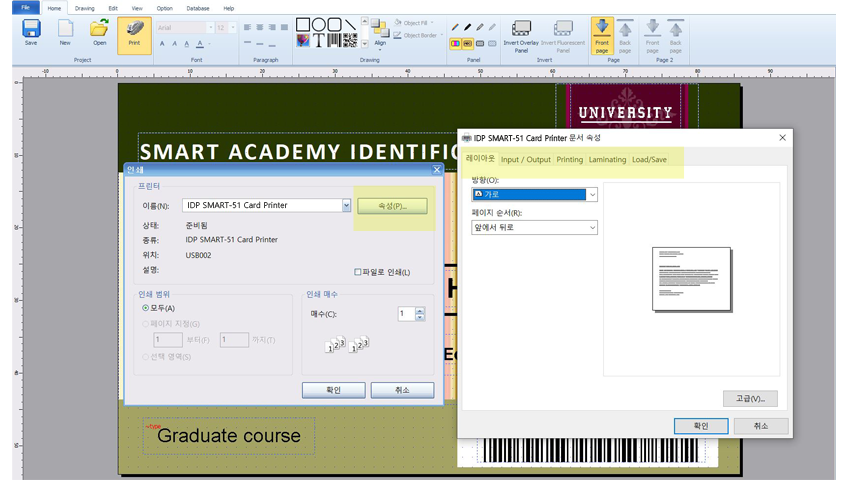
[Layout-Input/Output-Printing-Laminating-Load/Save]
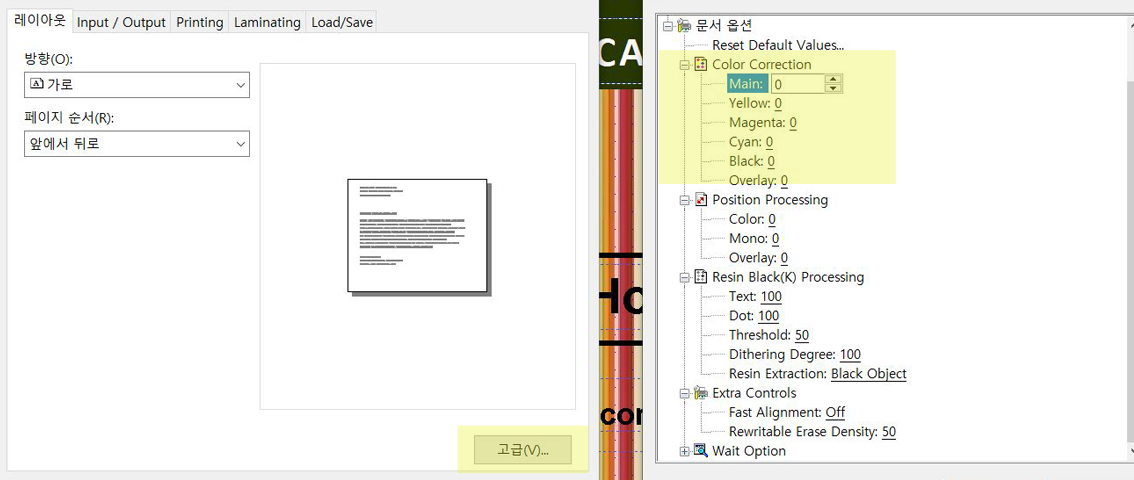
There are some key printer functions you can manually control on printing sections:
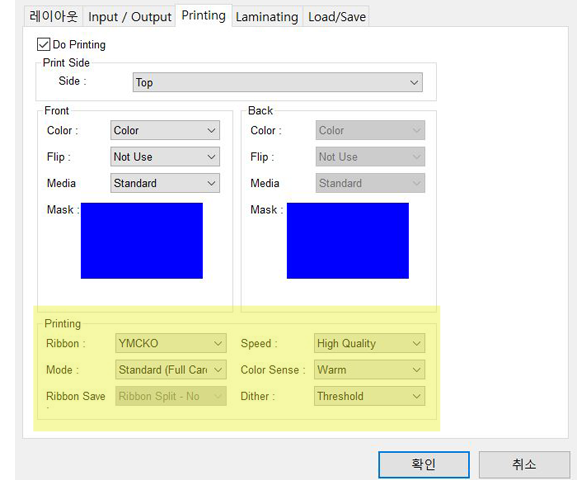
[Ribbon options / Printing speed / Color sense / Color correction]
All setting values at "Advanced " listed below will slightly change the printer’s output.
It’s worth spending some time optimizing the settings to find the right color, chrome and mode for your business or brand.
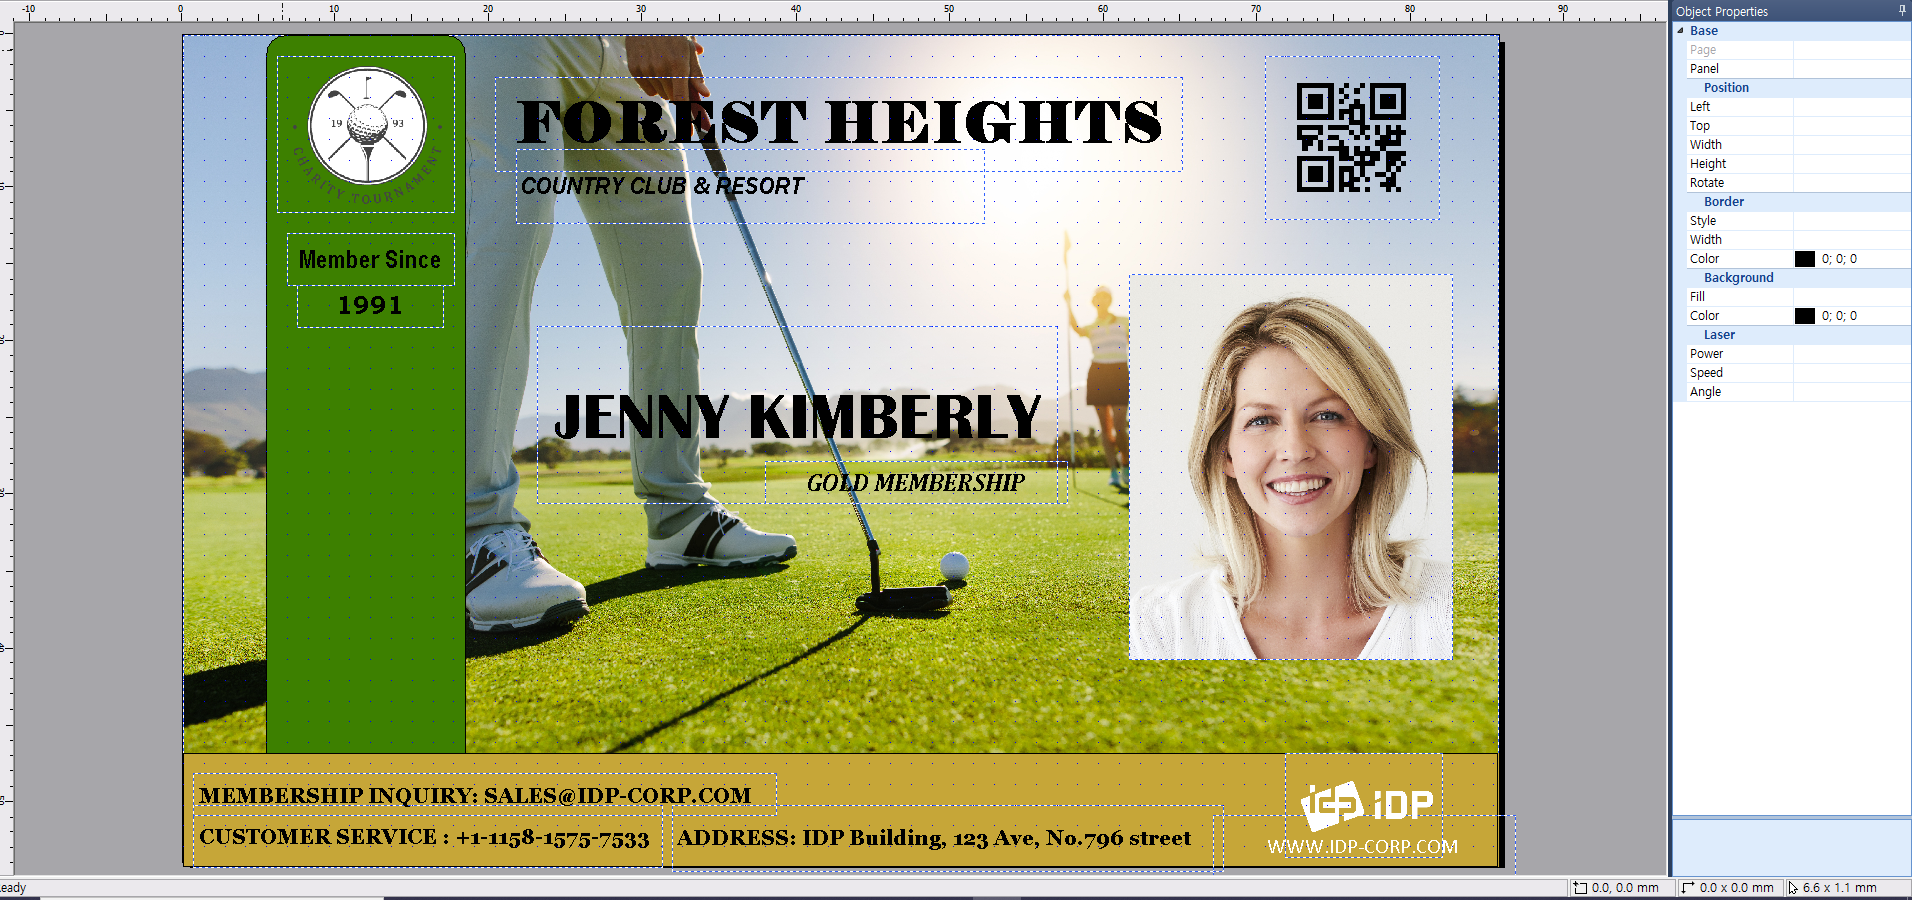
Last, click the [print icon], then you eventually get your own Photo ID Card.
Create your ID Card without template
In case that you have already had designed card,
Click the blank card design on the Template Wizard, and create your card design!!
It won’t be difficult to make a card without template if you were familiar with a few of the described features in the example above.